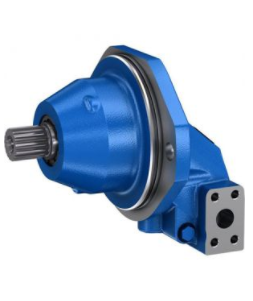
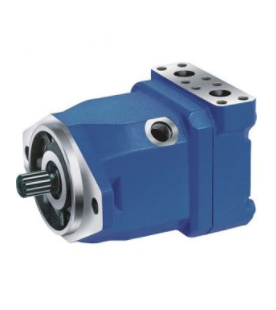
A&S Hydraulic Co., Ltd. The clearance of each pair of motors manufactured by Ltd has been matched well. Users are not allowed to change parts at will. In general, do not disassemble the motor at will, only in case of serious malfunction, the motor can be disassembled and inspected with the consent of our company.

(1) Preparations before dismantling
1. Remove the screw plug of the oil outlet and discharge the oil in the motor housing.
2 Unscrew five screws on the oil pan and remove the oil pan.
3. Remove oil distribution pan, positioning ring, cushion block, cylindrical pin and double-headed key.
Note: In order to prevent the change of the spin direction after reassembly, the same orientation marks should be made on the end face of the output shaft and the oil distribution plate.
(2) Sequence of disassembly and assembly
1. Remove the cover, screw the clean screw into the central screw hole of the crankshaft, and hang out the crankshaft.
Remove the clamp on the connecting rod.
3. Remove the assemblies of the plunger connecting rods and mark them one by one so that the original assembly clearance can be guaranteed when the assemblies are re-assembled. Ordinary users can check and repair when they dismantle it. If necessary, they can decompose the combination of plunger and connecting rod: loosen the spring retaining ring for opening, take out the retaining ring, and the plunger and connecting rod can be separated.
4. In assembling according to the reverse procedure mentioned above, attention should be paid to ensuring the axial clearance of bearings.
Before assembly, all parts must be cleaned to prevent scratches or bumps on any working surface.
If there is only sand hole oil leakage of plunger sleeve or oil leakage of joint surface between plunger sleeve and shell, the screw on the plunger sleeve can be loosened, the plunger sleeve can be removed, and the plunger sleeve or "O" ring can be replaced.
Problem, Cause Analysis and Elimination of Hydraulic Motor
1. Rotation is contrary to the intended direction
Oil Distribution Disk Installation
Remove the oil pan, take out the oil pan, rotate 180 degrees and reload.
1. Problems in other parts of the system
Check the system and exclude it.
2. The rotational speed decreases abnormally and the output torque decreases.
2. Serious motor leakage
1. Check the contact surface between the oil pan and the shell 2. Check the seals joined between the parts 3. Check the viscosity of the hydraulic oil and the working oil temperature 4. Wear condition of the moving parts 4.

3. Large leakage in motor
1. Check the wear of the sealing ring on the oil distribution pan 2. Check the wear of the oil supply pan and whether the two oil chamber channels of the castings in and out of the oil outlet are in collusion.
3. The motor does not turn and the pressure does not go up.
1. Problems in other parts of the system 2. Breaking of double-headed keys
1. Check the system and exclude it. 2. Remove the oil pan and distribution pan and replace the parts.
4. The motor does not turn but the pressure rises.
1. A moving pair inside the motor bites each other. 2. Load exceeds the set value.
Dismantle and inspect, replace parts.
Oil leakage from plunger sleeve or oil pan
Casting sand hole
Replacement of castings
5 Oil leakage from other contact surfaces with shell and end faces of output shaft
Damage or aging of rubber sealing ring
Replacement of rubber sealing rings
Oil seal damage or spring fall off and aging bearing wear, big jump out of the shaft
1. Replacement of oil seals 2. Adjustment of clearance or replacement of bearings
6 noise anomaly
1. Connecting rod and bearing sleeve bite or damage 2. Clasp fracture, bearing bite. 3. Discentric coupling 4. External vibration 5. Noise of other hydraulic systems
1. Replace the parts, check whether the bearing on the thrust seat is damaged and clearance, and correct. 2. Check the coaxiality of the coupling connected to the motor and correct it. 3. Correct coaxiality 4. Take seismic precautions 5. Check the system and eliminate it.
7. Temperature rises too fast
1. Insufficient cooling of the system
2. Serious wear and tear of main parts
Check and improve. Troubleshooting Method in Same Fault 4
Fault Causes and Removal Methods Order Notes:
1. Users can choose motors of different specifications according to the working requirements of the main engine. When ordering, please specify the product type, quantity, delivery date and arrival. Letters or faxes are acceptable.
If there are special requirements for installation and connection dimensions, please contact our company for relevant formalities when ordering.
